[OpenPLC] OpenPLC Editor 2.01 설치, 아두이노 우노에서 테스트
OpenPLC Editor 설치
- 버전 : OpenPLC Editor 2.01 Release: 2023-10-18
1. OpenPLC 사이트에서 프로그램을 다운로드한다.
https://autonomylogic.com/download-windows
Download – windows – Autonomy
autonomylogic.com
2. OpenPLC Editor 프로그램을 실행한다.

3. Blink 예제를 연다.

메뉴 > 파일 > Tutorials and Examples > 2: Blink
프로젝트 > Unnamed > Blink를 더블클릭한다.
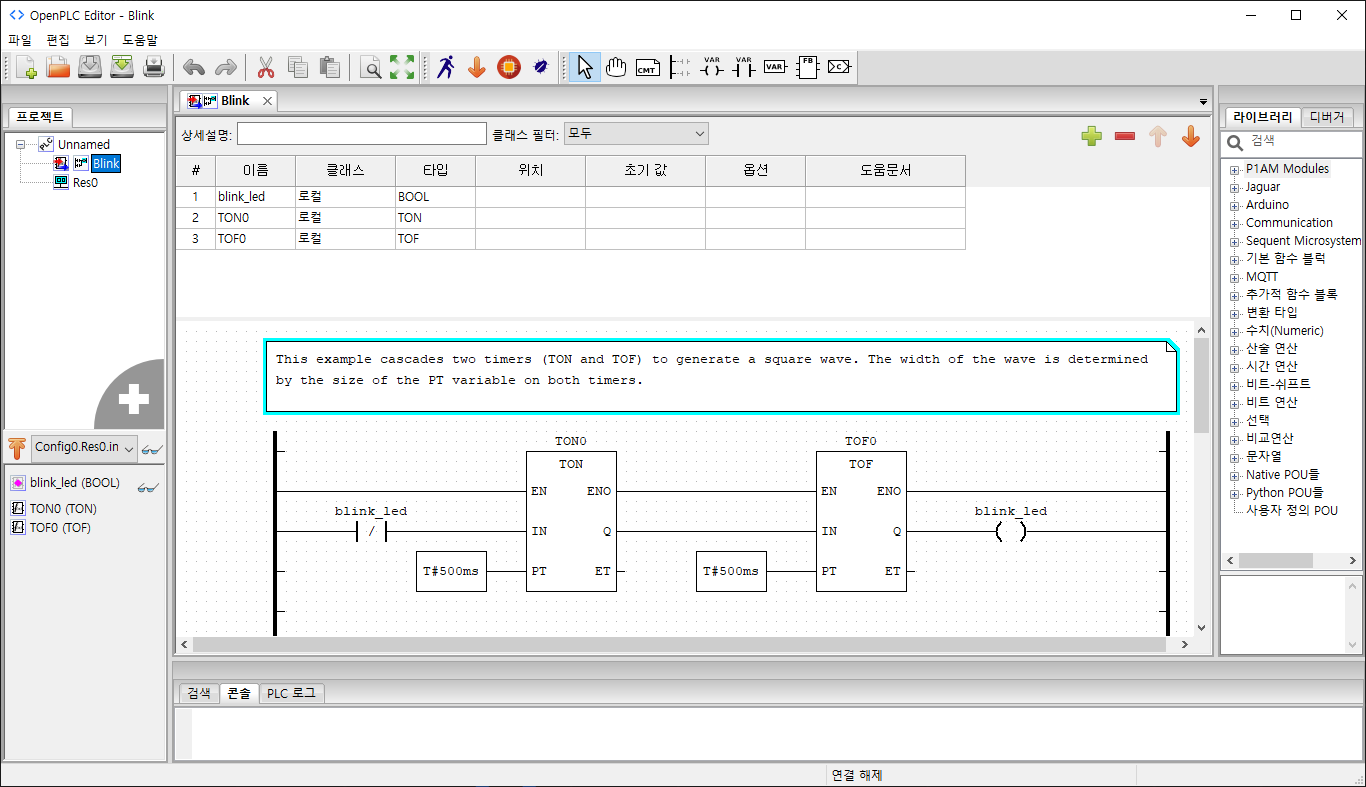
Blink 예제 프로그램 창이 나타난다.
4. OpenPLC Pysical 주소를 확인한다.
autonomylogic.com 홈페이지 > Documentation > 2. OpenPLC Runtime > 2.4 Physical Addressing 연다.
https://autonomylogic.com/docs/2-4-physical-addressing/
2.4 Physical Addressing – Autonomy
autonomylogic.com
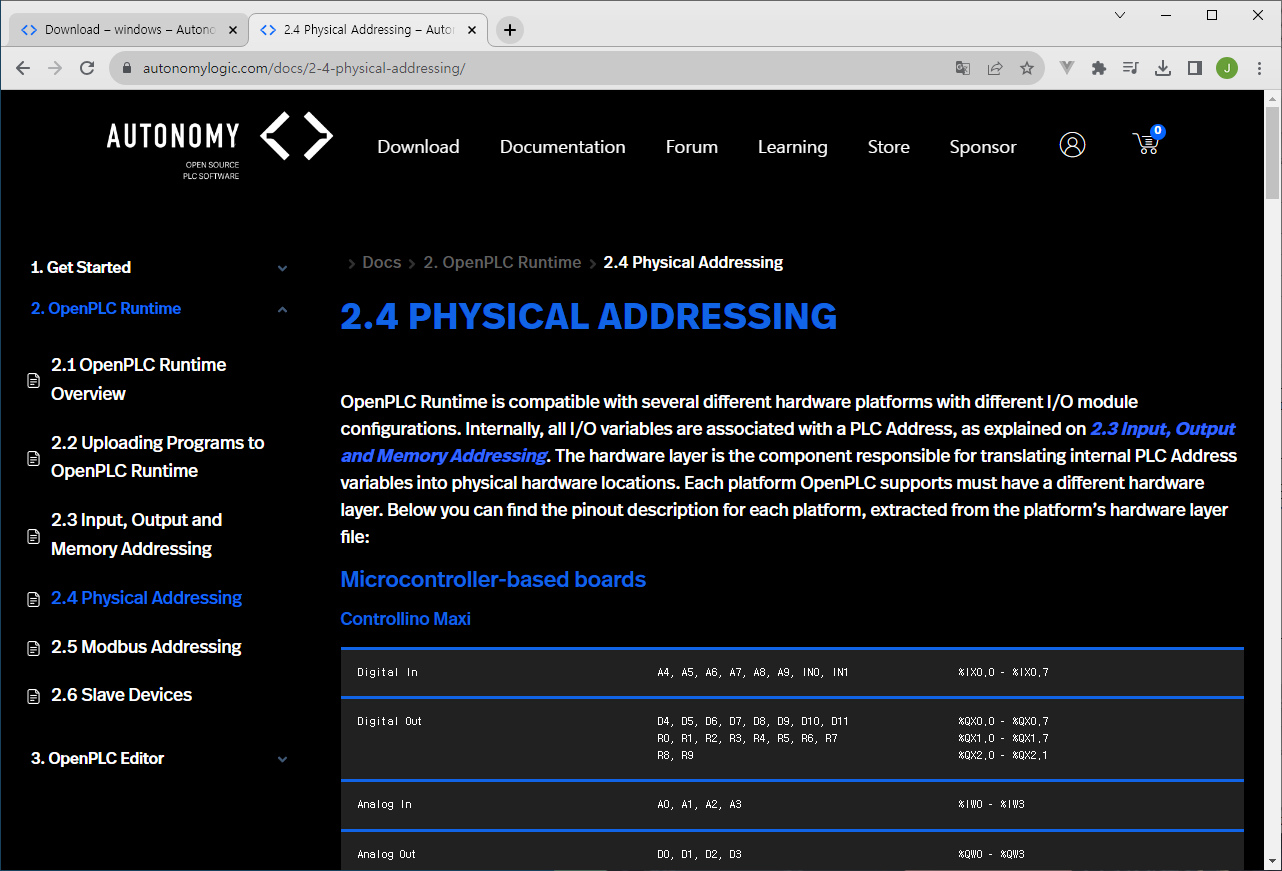
스크롤하여 Uno, Leonardo, Nano, Micro, Zero를 찾는다.

아두이노 우노 보드의 led는 13번 핀이므로 %QX0.3이다.
5. Blink 예제 led에 주소를 입력한다.
Blink > blink_led > 위치에 %QX0.3을 입력한다.

6. 아두이노에 프로그램을 전송한다.
아두이노를 연결한다.
툴바 > Transfer program to PLC을 클릭한다.

Transfer Program to PLC 팝업창에서 Board Type을 Arduino Uno를 선택한다.

COM Port를 선택한다.
Transfer to PLC 버튼을 클릭한다. (처음 이 버튼을 눌렀을 때 여러 패키지를 다운로드한다. 한 번만 다운로드하고 이후에는 빌드하고 전송만 한다.)
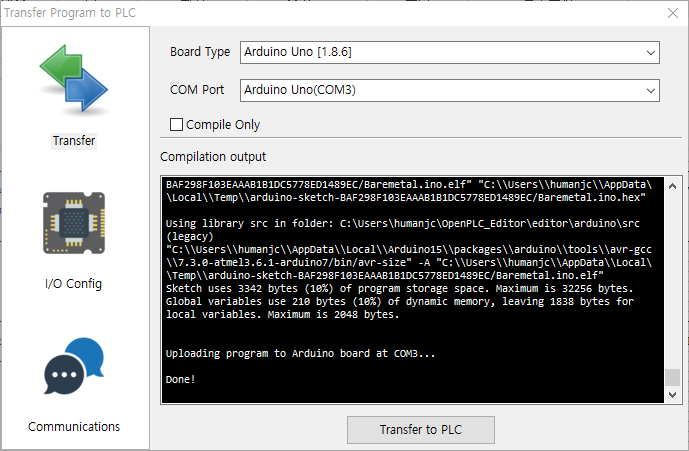
프로그램이 정상적으로 전송되었다.
7. 아두이노 LED가 깜빡인다.
